RACE DAY CHECKLIST
Welcome to TrainingPeaks! A guide to help you get started with your coach account.
Introduction
This quick-start manual will help you get a basic understanding of TrainingPeaks Coach Edition and move you toward maximizing your coaching efficiency. Learn about account settings, navigation, season planning and metrics analysis to optimize athlete performance.
If you’re looking for a deeper dive into the key features and how TrainingPeaks fits into your coaching business, take the free TrainingPeaks Coach Introduction Course on TrainingPeaks University.
Quick Tips
- Add a new athlete to your account to start coaching them by opening your athlete library and clicking “+ Athlete” then send the link to the athlete
- Choose your units preference (English or Metric) and preferred date format in your Account settings by clicking your name in the upper right corner, then select “Settings” and scroll to the “settings” section
- Set your athlete’s thresholds and zones by clicking the gear icon next to their name above the calendar. If you have your own zones that you’d like to implement within TrainingPeaks, create Custom Zones and then apply them to athletes as you onboard them.
App Libraries
On the left-hand side of the TrainingPeaks page are your Athlete, Workout, and Training Plan libraries. These libraries are where you can view your list of athletes, access your saved workouts for quick planning, and create and save reusable training plans. The specific libraries shown will change depending on which view you have selected for the main panel (Home, Calendar, Dashboard, or ATP).
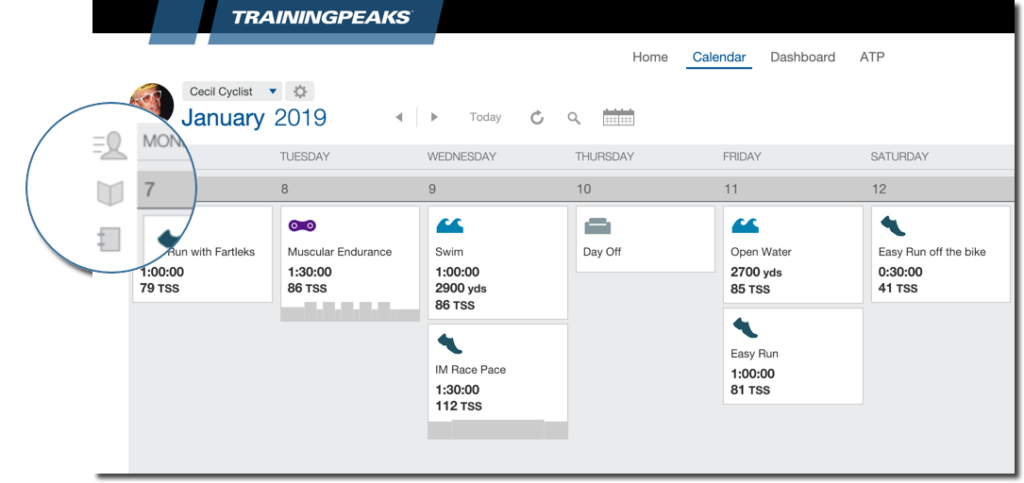
ATHLETE LIBRARY
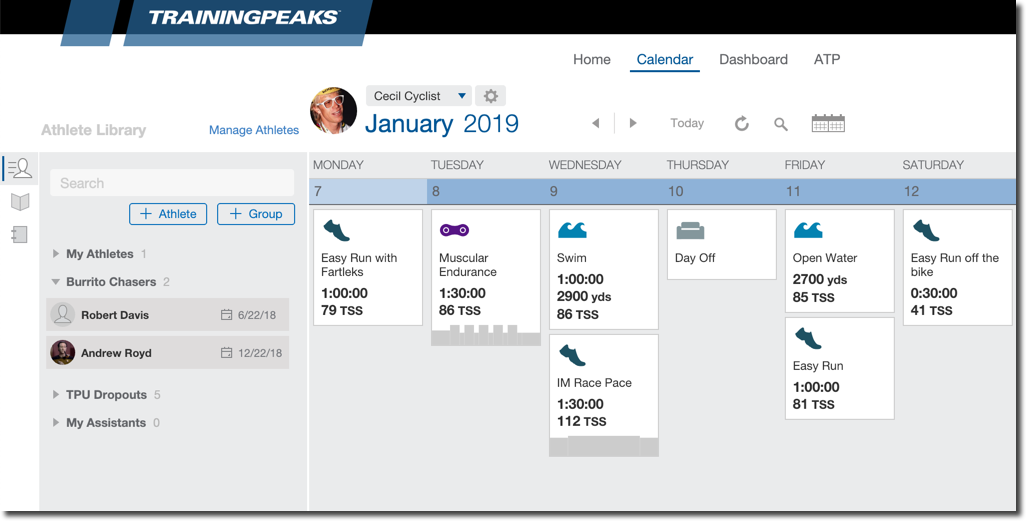
Add a new athlete
- To add a new athlete to your coach account select “+ Athlete” at the top of your Athlete Library. You will be given a unique link that you can either email to your new athlete or copy and send to them however you like. When the athlete clicks that link their existing account will be connected to yours, or they will be prompted to create a new account which will be automatically added to your list of athletes.
Load athletes
- You can load an athlete to any of the main views by clicking their name in the Athlete library and selecting “load”, or by dragging them directly onto the center view. From the Calendar view, you can also quickly switch between athletes by clicking the athlete’s name above the calendar.
Athlete Settings
- Click on an athlete in your library and then click the gear icon in the upper right corner of the card to access that athlete’s account settings and update their thresholds and zones. You can also access an athlete’s settings from the gear icon next to their name at the top of the calendar.
Athlete Groups
- You can group your athletes for easier planning, review, and management. Athlete groups can be loaded separately in the Home view and in the Group Calendar. Athletes won’t see what group they are in.
Manage Athletes
- Click on the “Manage Athletes” link at the top of your Athlete library to view an administration page with more advanced features for managing your athletes including bulk actions (remove, share, or group multiple athletes at once). There are also advanced sorting and filtering options to easily see which athletes you are paying for, which are paying for their own accounts, and which are shared.
WORKOUT LIBRARIES (CALENDAR VIEW)
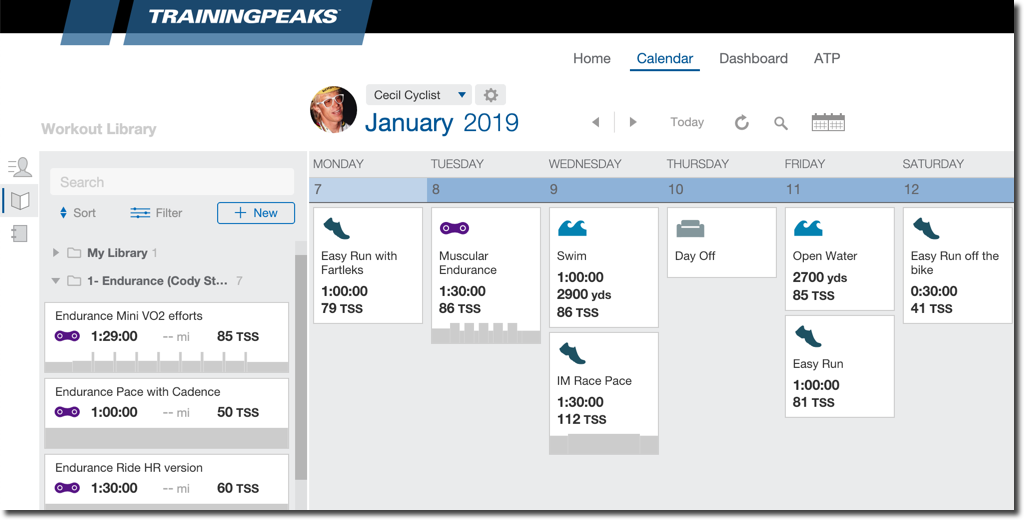
Add Workouts
- Add a new workout to an athlete calendar by click the “+” on any day. As you create workouts you can drag them into any of your Workout Library folders and it will make a copy that you can reuse in the future by dragging them from the library folder to the calendar
- Select the “Build Workout” option when creating workouts to build a Structured Workout that will automatically calculate the total duration and other metrics and update the target power, pace, or heart rate values based on the athlete’s threshold when applied to an athlete’s calendar. Structured workouts can also be synced to a number of devices and indoor training platforms.
- Organize your workouts into folders to make them easier to find or to improve your planning efficiency.
- New Coach accounts also come with Joe Friel’s workout library of over 700 workouts of all sport types. You can modify these to start filling out your own libraries or use for inspiration for different workout types.
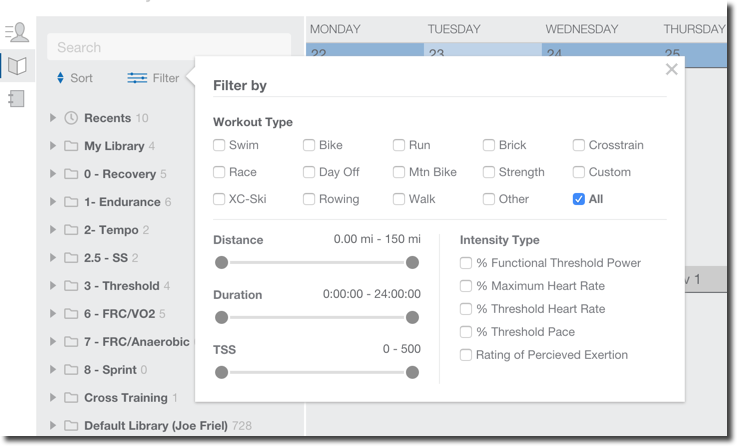
Find your workouts
- Use the search bar at the top of your library to find workouts based on the title or description.
- “Recents” shows your 10 most recently used workouts.
- “Filter” helps you find specific workouts based on type (Swim, bike, run, etc), distance, duration, or TSS, or by Intensity Type (heart rate, power, pace, RPE).
TRAINING PLAN LIBRARY (CALENDAR VIEW)
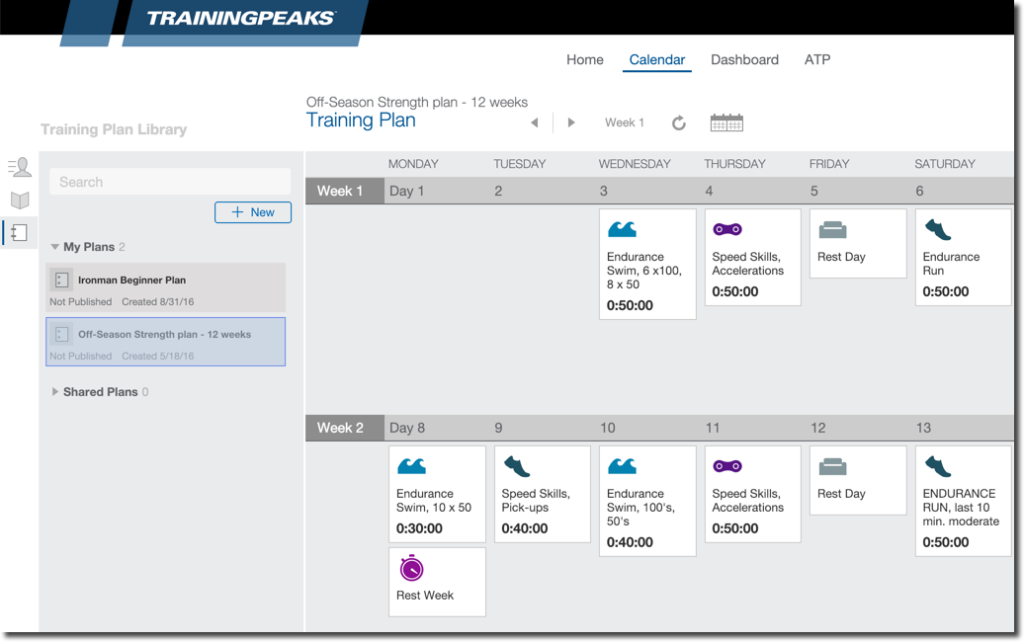
- From the Training Plan Library you can create multi-week training plan templates that can be applied to your athletes to save time or sold in the TrainingPeaks Training Plan Store.
____________________________________________________________
App Views
HOME VIEW
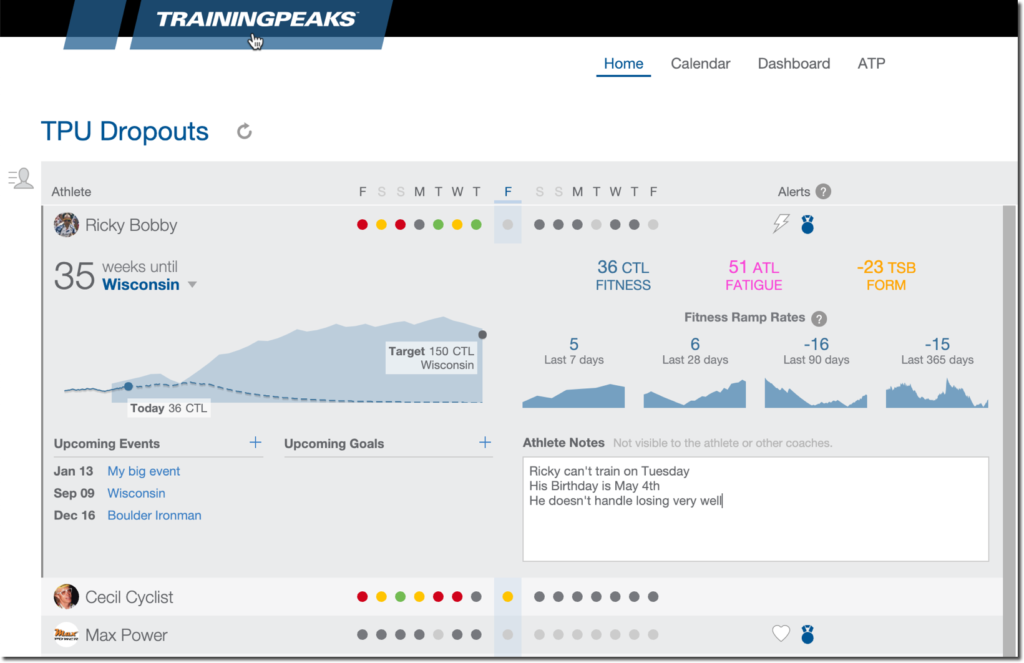
- The Home view gives you a quick overview of a group of athletes, including their recent workout compliance. Switch the displayed group by clicking on the group name at the top left of the Home view.
- The “Alerts” section notifies you if any athletes may need updated threshold settings, have new Peak Performances, or if their accounts are expiring soon.
- The Feed on the right side shows you recent activity from that group of athletes and can be filtered by Workouts, Workouts with comments, metrics, or unread items.
- Selecting an individual athlete in the group will expand to show more information about that athlete current training status, upcoming events, notes about that athlete. Selecting an athlete will also filter the Feed to only show items from that athlete.
CALENDAR VIEW
- Quickly switch athletes by clicking the athlete name at the top of the calendar. Access that athlete’s settings by clicking the gear icon next to their name.
- Quickly jump to a different date by clicking on the date at the top of the calendar to open the date picker.
- Plan workouts for your athletes by dragging and dropping workouts from your Workout Libraries onto the calendar, clicking the “+” on a day to create a new blank workout, or copying and pasting existing workouts. Click the ☰ on the workout card a single workout and click the ☰ in the day header to paste a workout or to copy all of the workouts from that day.
- Copy and paste multiple days or weeks of workouts at a one time by clicking the day header of the first day, hold down the shift key, and then click the day header of the last day to select all of the workouts in that range.
- Click on completed workouts to view basic information about that workout. Select “Analyze” to open the expanded workout view for more detailed information and to view the map, graph, and other charts for that workout. Charts in the Analysis view can be rearranged, resized, and additional charts can be added by selecting them from the chart library icon in the top middle of the analysis view.
DASHBOARD VIEW
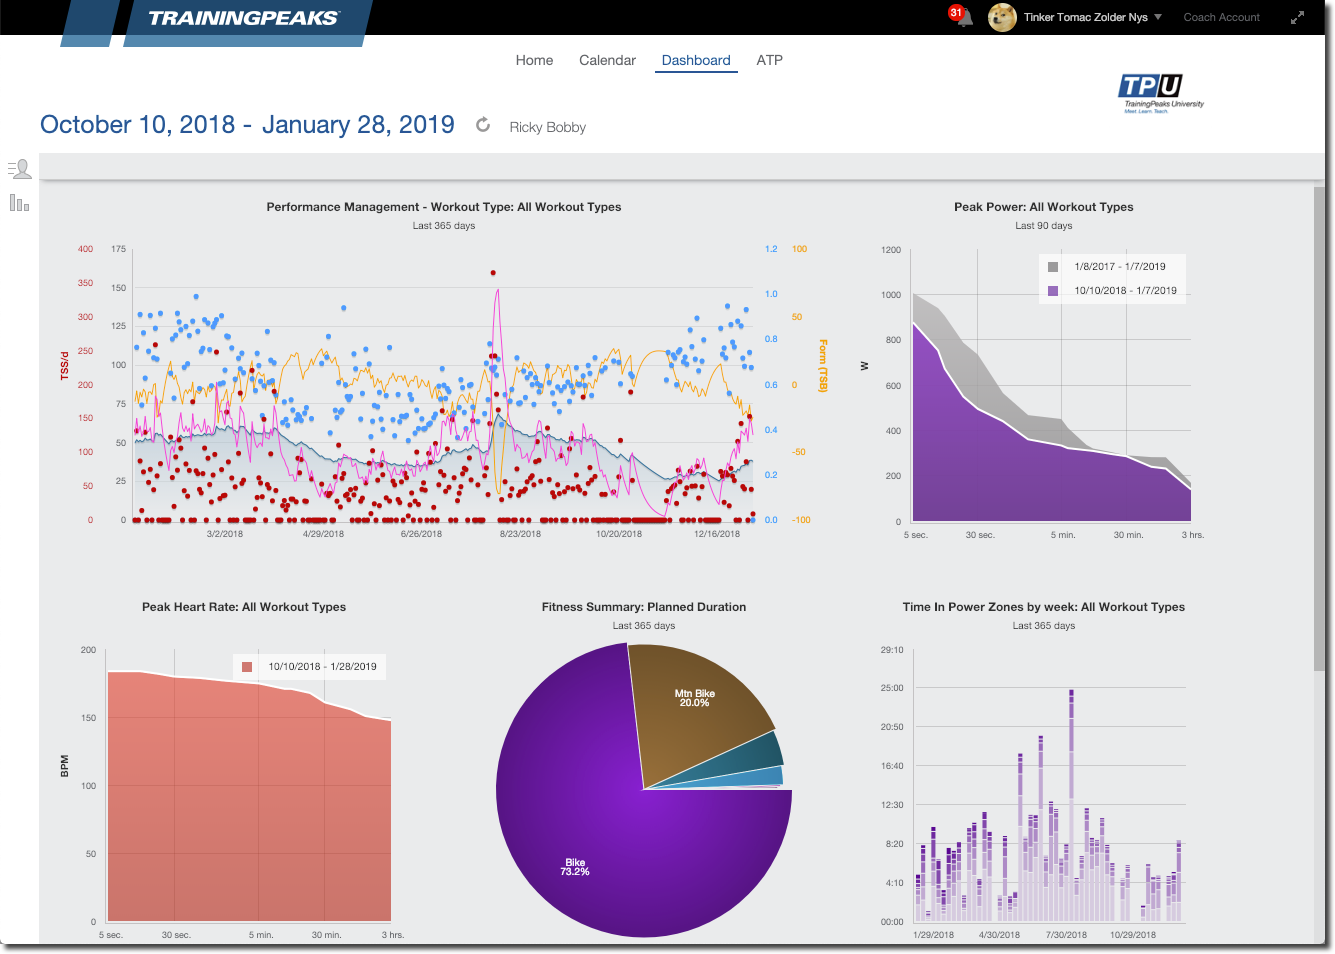
- The Dashboard has a variety of charts and reports to help you track your athletes’ trends and performances over time. Add new charts to your Dashboard from the chart library on the left side of the view.
- The Dashboard is where you can view the detailed Performance Management Chart to help you track and plan the training load for your athletes.
ANNUAL TRAINING PLAN (ATP) VIEW
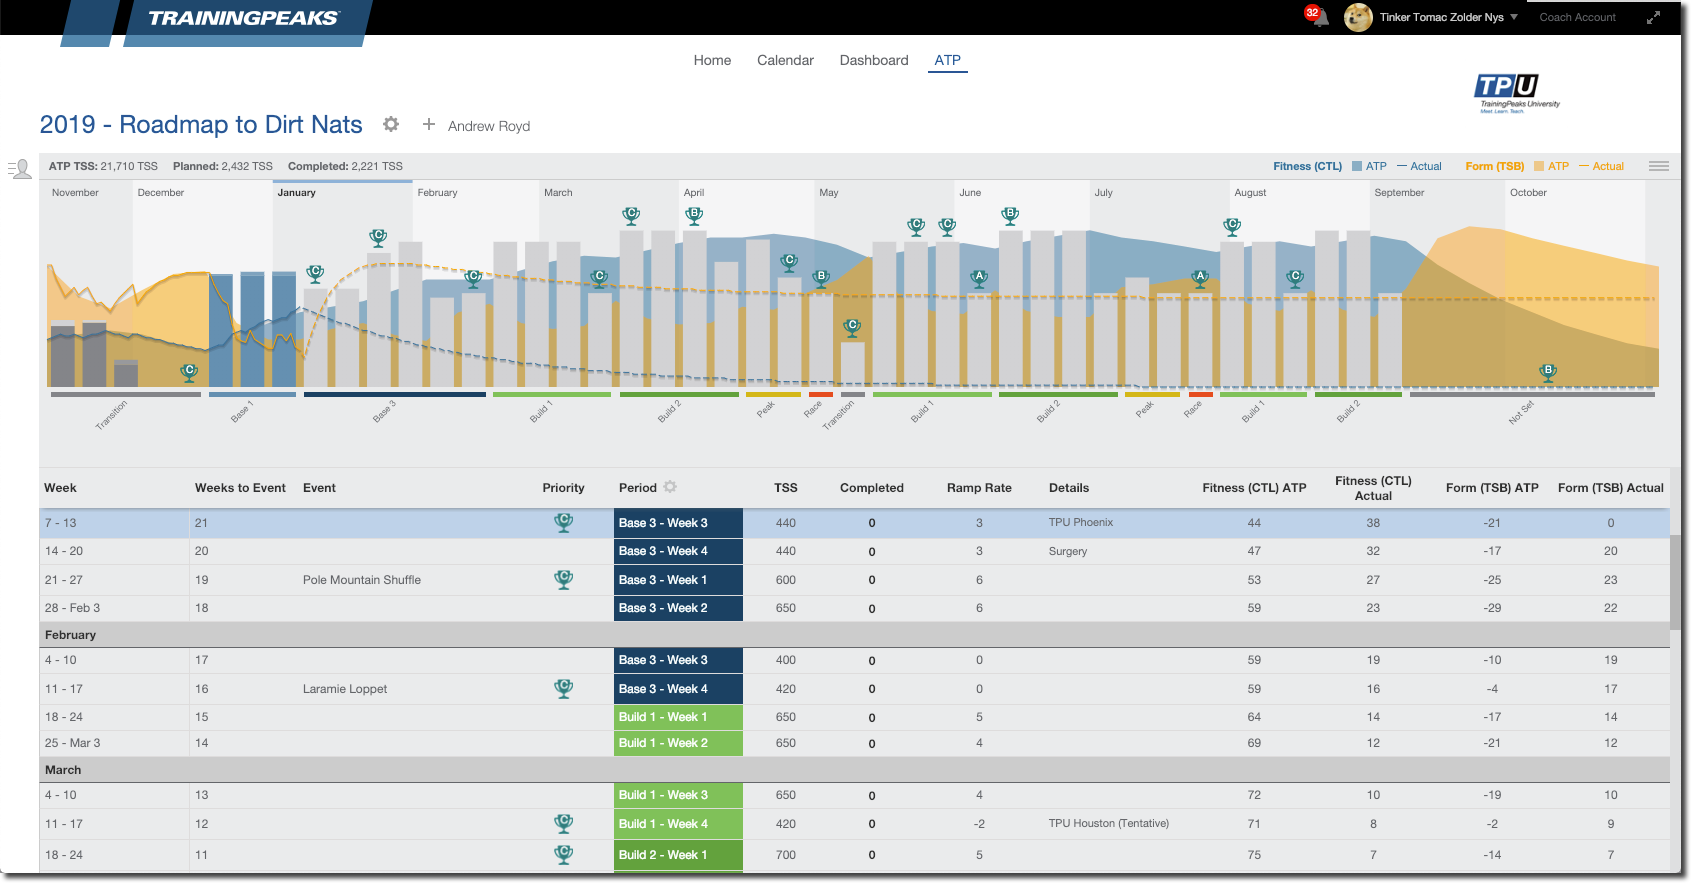
- The Annual Training Plan lets you create a season-long general periodization plan for your athletes.
Additional Resources
Click here to enroll in a free, in-depth mini course on using the Annual Training Plan.
____________________________________________________________
Settings and Account Management
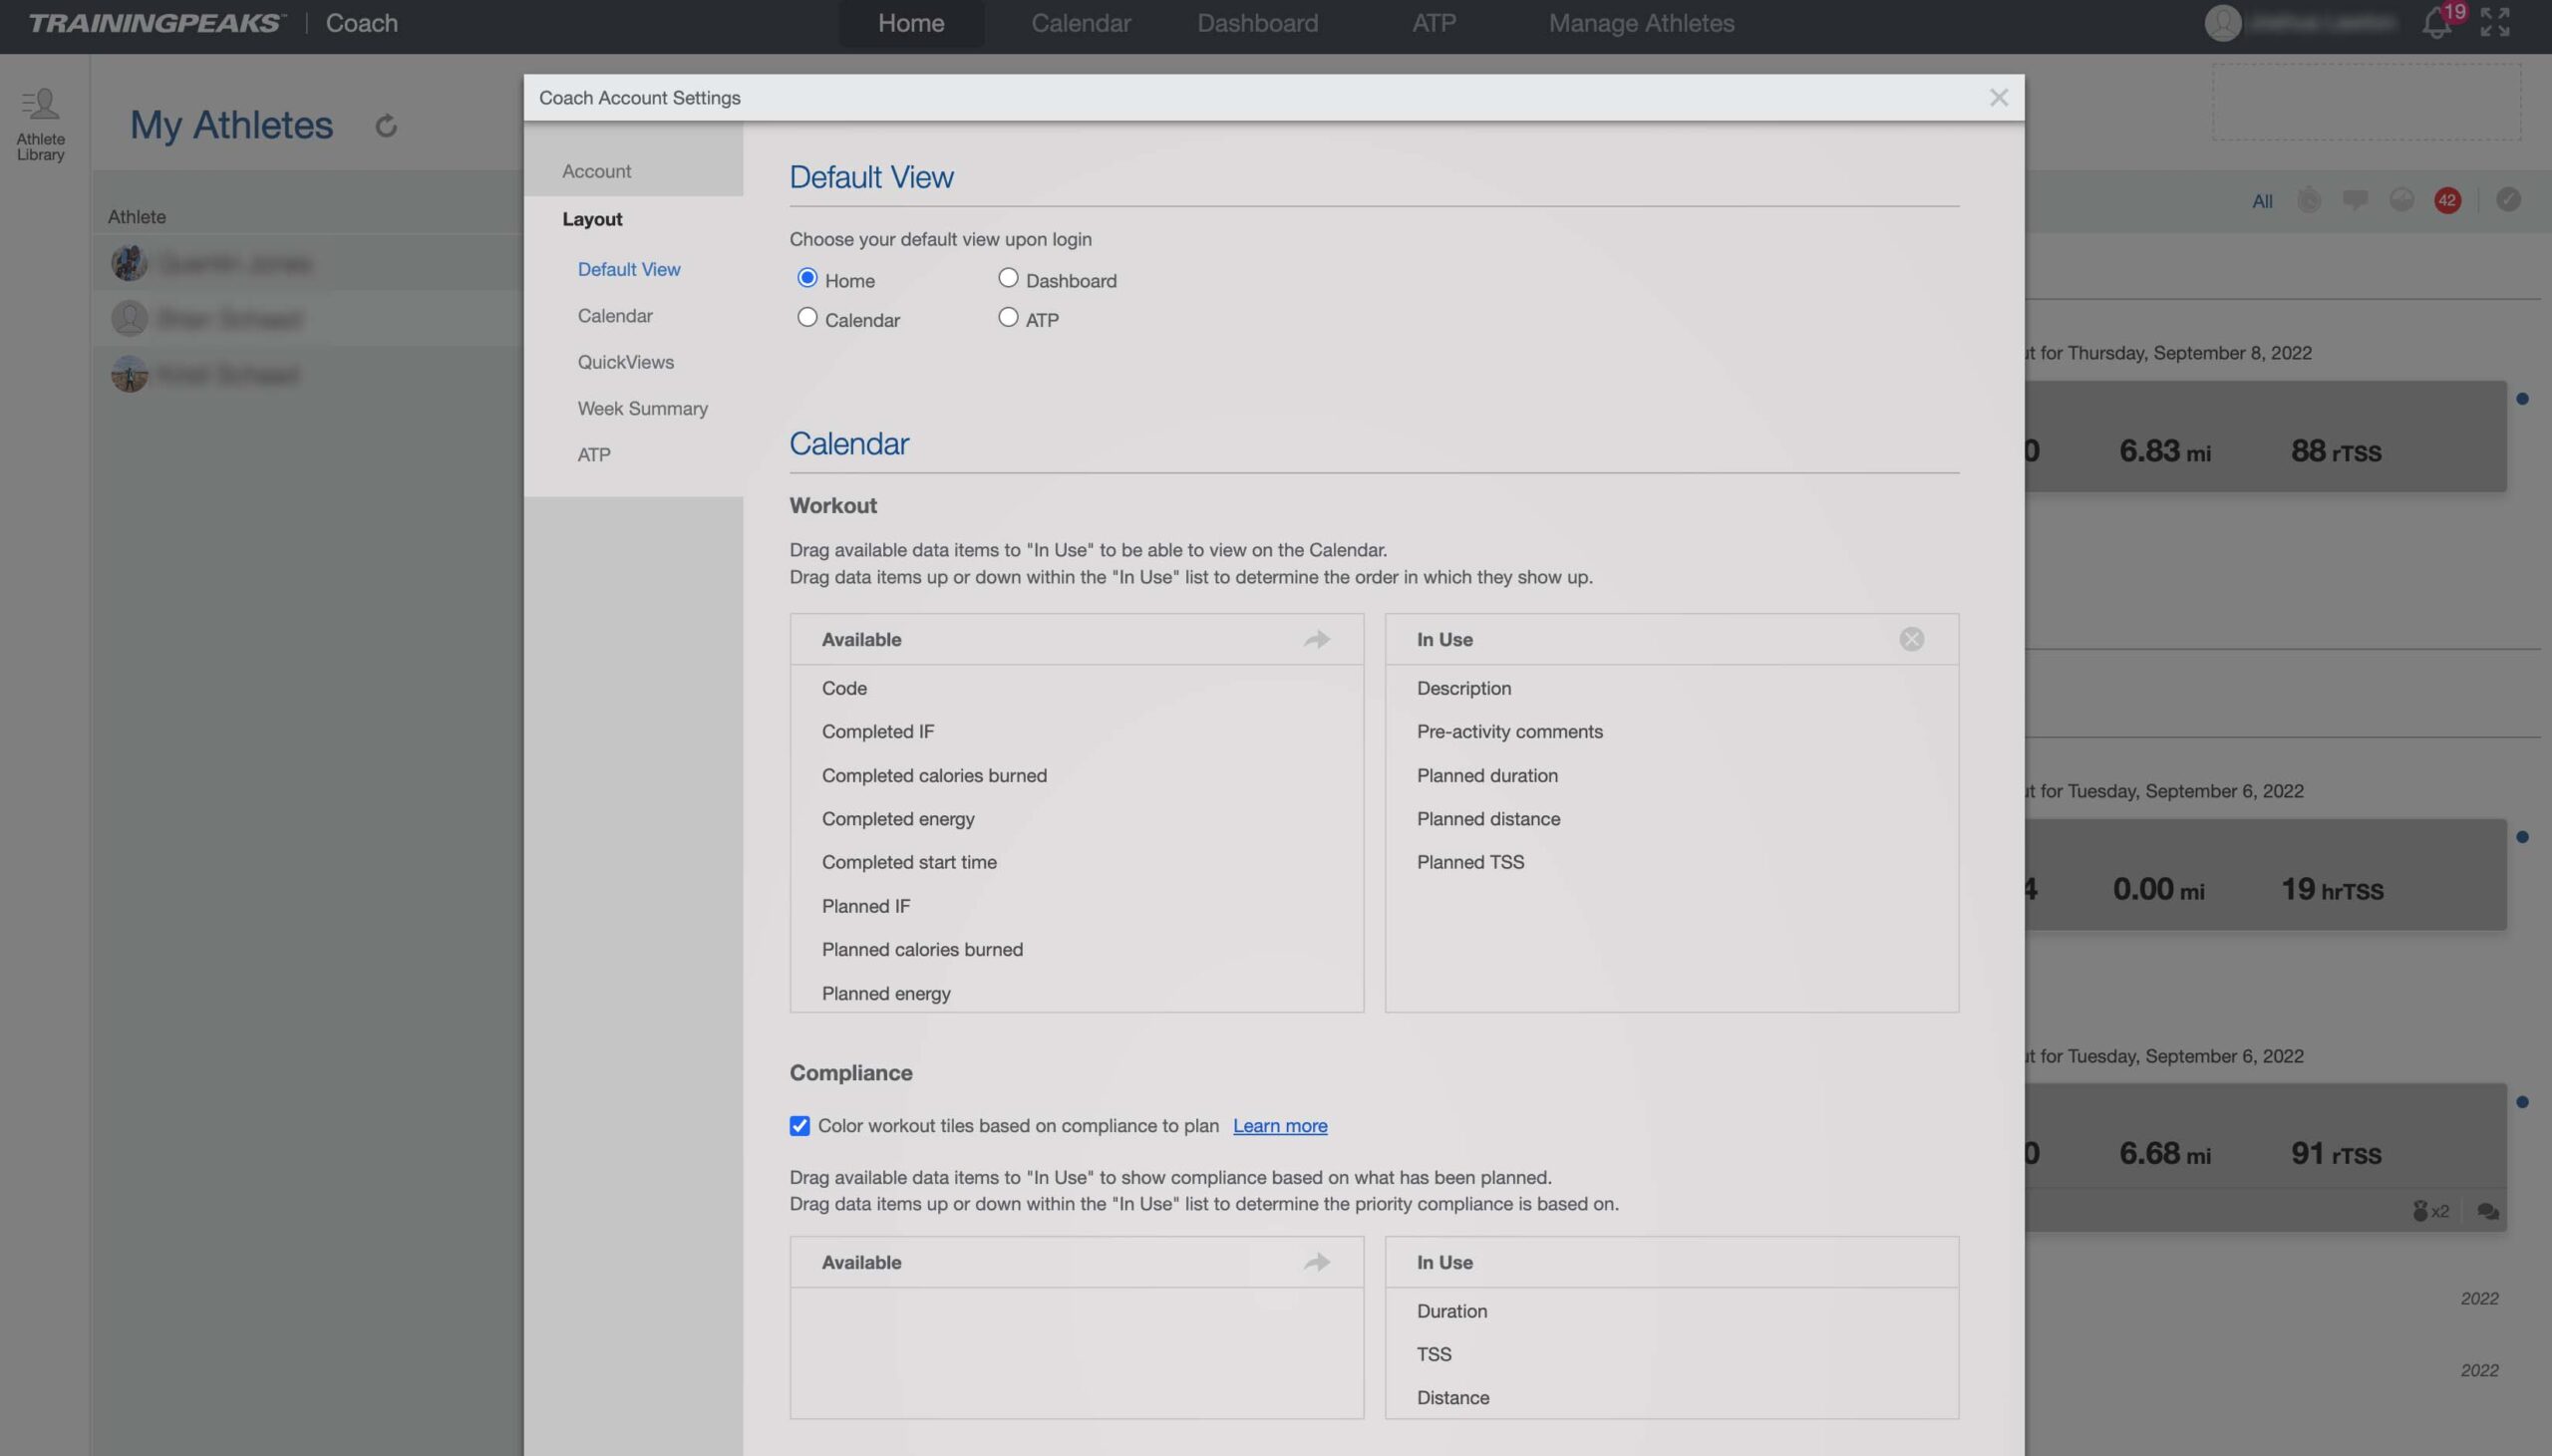
- Click your name in the upper right corner of your TrainingPeaks page to access your account settings.
- Select whether you prefer English or Metric unit in the “Settings” section.
- Adjust your notification and email settings for each athlete under “Notifications”.
- Configure the layout of your calendar and workout cards to your preferences under “Layout”.
- Access your TrainingPeaks account billing under “Settings > Manage your subscription and payments” or by navigating to home.trainingpeaks.com/accountmanagement.
Next Steps
- Find out how TrainingPeaks can support your coaching business
- Learn more through TrainingPeaks University online courses.
- Gain valuable insights from coaches and scientists with the TrainingPeaks CoachCast
- Stay current on the science and business of Coaching with the TrainingPeaks Coach Blog


