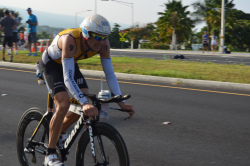
 The “dreaded” climb to Hawi on the Ironman Kona bike course is an opportunity for a strong, strategic cyclist to make their mark, or for an unprepared competitor to derail their race. In this post, you’ll get 5 tips on how to conquer the climb to Hawi with proper pacing and mental preparation.
1. Be Prepared
Both the climb to, and descent from, Hawi include a potent combination of winds. In most situations, you’ll begin the climb on a false-flat with a slight tailwind, and then about 4-5 miles into the climb, as the grade increases and you get farther from the ocean, you’ll be facing a strong headwind and crosswind combo. So how can you adequately prepare? First, be comfortable in your aero position for extended periods of time. The more you sit and stand on this climb, the more the wind is going to slow you down. Next, be comfortable with a high cadence, since many cyclists tend to revert to muscle-fatiguing gear-mashing in the wind. Next, mentally decide that you are going to “embrace the wind” and not let a stiff headwind get you flustered or frustrated. Finally, get used to handling your bike in crosswinds, and if you don’t have crosswinds for training, then toss in a few mountain bike rides to get your reflexes and bike handling prepared.
2. Don’t Start Slow
Most tips you read about Hawi tell you to “conserve energy” on the climb, so that you have enough oomph to make it back into Kailua (since you have nearly 50 miles still to ride when you get to Hawi). However, you’ll lose time if you slow down and conserve energy too early in this climb. After the turn to Hawi, as mentioned above, you’ll still have several miles of tailwind and relatively easy riding, and if you spin this section slowly, you’ll give up precious minutes.
I’d recommend you actually stay somewhat aggressive and push the pace all the way from the turn to Hawi until the road really starts to wind away from the ocean and you hit the heavier headwinds and grades. A bonus of this approach is that you stand a chance to drop wheel-drafters before they get a chance to really benefit from drafting off you.
3. Fuel Up
Special Needs is in a tough spot, since it’s just before you start the fast, technical and crosswind laden descent from Hawi. If you’re munching on your Special Needs nutrition at this time, you’ll either be forced to go slow, or get blown off the road. A good strategy for this section is to instead fuel up on the relatively flatter, faster section just before the major climb and headwinds to Hawi begin (around mile 5 on Akoni Pule Highway), then grab your Special Needs bag, and get through it FAST.
Here’s how I personally do this: I just put one bar in Special Needs, along with either a bottle full of fuel or a handful of gels. I toss the fuel bottle on my downtube or the gels in my shorts leg, stuff the entire bar in my mouth, and try to be off within 15-20 seconds, keeping my hands free to handle the bike on the descent.
4. Hang Loose
On to the descent! The whole time, if there is a rider anywhere in front of you, you can watch them to see when they move side to side. When they move, you can expect a stiff crosswind any second. Stay relaxed, hang loose, and don’t tighten up. A death grip on your handlebars combined with holding your breath is going to detract from your wattage on the bike.
Try to stay as relaxed as possible, maintain your aero position, lean slightly in the opposite direction of the crosswind and trust your handling. It takes a much bigger gust than you think to actually blow you off the road. Just stay focused, alert and keep pressure on the pedals. As long as you’ve fueled and hydrated up prior to starting down off Hawi, you won’t really need to worry about eating and drinking until you’re done with the descent.
5. Spin It Out
Don’t “cruise” the descent. Keep the cranks turning. This will help to flush lactic acid, and in the same way that a boxer or tennis player “dances” between bouts, it will help to keep the muscles in your legs alert and awake.
This is especially handy since you’ve got a deceptively tough gain in elevation before you take a right turn back on to the Queen K highway. If your legs have just been “chilling” for the past 15-20 minutes, this climb is going to be much harder, so keep your legs moving no matter what!
Your ride is by no means over after you’ve polished off the descent from Hawi, but the strategies above will keep you in the race and competitive during the tougher and more technical section of the bike course. Have a great race, and I’ll see you out there!
Below is the course profile for the Ironman Kona bike leg. (Note: elevation (green) is measured in meters.)
Do you want live updates during Ironman Kona? Make sure to follow us on Twitter and Facebook. After the race is over be sure to check our website for power analyses from the world’s best Ironman athletes.
Are you training for an Ironman or Half-Ironman? Ben has plenty of Ironman specific training plans to help you preform at your best.

